Showing posts with label Terrain. Show all posts

Tuesday, May 4, 2021

More Re-Basing - HG Div

The re-basing continues. This time it's the Hermann Goering Division. These guys are panzer grenadiers and as such they have lot of Light Machine Guns (LMG's). When I started this rebasing I thought I could do these guys relatively quickly but I found that it took fair bit of time to accumulate loads of LMG's (18 in all). I know that for 'O' Group I don't really need to represent all of the LMG's but I wanted them to look different and representing the huge amount of automatic weapons in the battalion was the way to do it.

They don't really look that much different to other German units but they do have Luftwaffe blue trousers and head gear and they also have a different camouflage smock. The figures are a mix of PSC plastics, AB Figures and Esci/Italeri plastics.
I don't have many heavy weapons for them yet. Just what you see here. But I can always sub regular infantry heavy weapons until I get some more painted up.
There are a few reasons I chose to do this particular unit. One is because I wanted an elite/prestige unit but I didn't want to do any SS purely on moralistic grounds. Another good reason for doing the HG is because I've never seen anyone else paint them up and put them on the table. A third reason is because I want to concentrate more on the Mediterranean Theatre and the HG Div fought all through Sicily and Italy. Anyway, what ever my reasons: I think they look great.

+++++++++++++++++++++++++++++++++++++++++++++++++++

I also made some new terrain. As mentioned above, I want to concentrate more on the Med but I have very little terrain that fits. So I'm in the process for making some and I decided to make some vineyards.
I've been wanting to make these for a long time but I didn't know how to go about it. I got the Setting The Scene books by Pat Smith last year and when I decided the time was ripe for making vineyards I went to that book and used the methods therein. The only difference is that I made mine individually instead of making them a large set terrain pieces. Thanks to Mr Smith, because otherwise, I wouldn't have had a clue how to make them.
The vegetation is from a long strip of artificial ground cover stuff that florists use. I found it in a local shop for $8 for a big roll. I just pulled of lumps of the stuff and glued it into position using contact adhesive. I still have most of the roll for use later on.
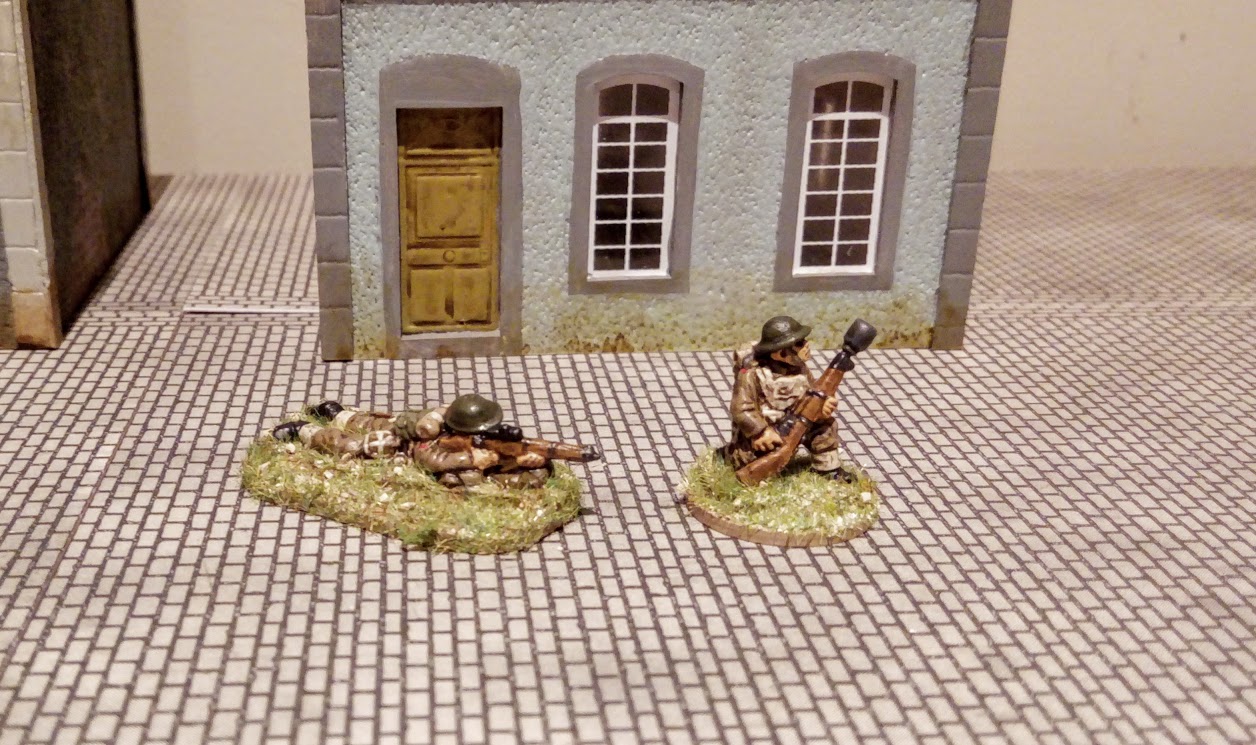
To give you an idea of the scale here's the HG's lurking in the vineyard ready to ambush some unwary GI's.

Saturday, March 27, 2021

More Re-Basing: German Infantry Battalion

 I'm continuing with my WWII rebasing. I finished my British/Commonwealth infantry and I then moved onto some Germans. Initially, I was going to concentrate on my Hermann Goering/ Luftwaffe troops because I thought they would need less work to get them up to speed. In the the end I decided to do the regular infantry first but I needed to paint up a full company (that's an O-Group company or a platoon for other rules) to get them up to strength.

So this is the basic battalion for 'O' Group. I'm going to paint a bunch of individual riflemen so that they can also be used for Battlegroup and Chain of Command by adding an extra figure to the gun group. This rebasing makes them a whole lot easier to store and organize and will also make them much easier to move on the table.
Apart from the heavy weapons above, I also have several mortars already based which can be used for various rules. Like the British battalion command base, I once again added a 12mm dice holder for ease of play.
~~~~~~~~~~~~~~~~~~~~~~~~~~~~~~~~~~~~~~~~~~~~~~~~~~~

Last week I bought a pre-printed 20mm building from Battlefield Accessories - an Australian company based in Melbourne. This is a really nice little building that went together nice and easily. I added some carboard edges to the corners and roof apex to cover up the joins & make them look a bit tidier. I also glued a few strips cut from the mdf sprue to the bottom of the top half of the building. This enables the top to lock into the bottom layer. It took about 15 minutes from start to finish and it was ready for the table top. They do them in 15mm and 28mm too.
As you can see, the design for this one is pretty simple but it looks quite nice. It has a printed interior too, which is somewhat plain but it's far and above blank mdf or plain plastic. The interior windows match the outside windows which is useful for those games where those sort of things matter.
And here it is with some AB figures for scale. It will go well with the pre-painted PlastiCraft buildings I already have which are sort of 15mm/20mm... sort of somewhere in the vicinity. So the scale may be slightly different but not so much that it will really matter.
~~~~~~~~~~~~~~~~~~~~~~~~~~~~~~~~~~~~~~~~~~~~~~~~~~~
Hopefully, I'm going to try a solo game of 'O' Group in the very near future. So keep your eyes peeled for a full battle report (the first in a long while).

Wednesday, November 6, 2019

A Good Place for a FOO

I made a new 20mm church. This is a card kit from Metcalfe Models. It a great model in every way and as soon as I've made a nice base for it, it will be on the table with a sniper in the bell tower.

For more detailed info about the build (and a lot more pics) have a look at my other blog here: Oooh Vicker!


Thursday, October 31, 2019

All Sorts (Except Licorice)

Greetings folk,

I've been making all sorts of stuff lately. A few buildings for Europe and the desert, I finished painting my BEF platoon and I've made a few models. There are some other things I've completed but these are the ones I have for posting today.

These desert houses are made of 5mm cork sheet. I like this material for making basic buildings like these because it has a nice texture that sits well. It's also pretty easy to work with. These buildings are very basic and I plan to make quite a few more that will (I hope) become a bit more complex as I become more adventurous.


These buildings are from Plasticraft. I ordered a bunch of these last year and made a pretty nice little town with little effort. These two were left over just because I had enough and I got a bit sick of painting them. So they have been sitting there making me feel guilty ever since. But now they're painted and they'll be on the table pretty soon.
 The back of the  roofs come off so that you can place troops inside on various levels.
Little Brits - So I've almost finished my BEF Platoon. For now this is all the infantry I need, which is enough for a basic game using CoC or Battlegroup. However, I'm waiting on some more figures for the command section to finish it off. I also have a Lewis Gun team, a Boys AT rifle and 2" mortar half painted. I think I also have a Vickers MMG coming with the command group.


This is a 1pdr AT gun. They were actually 25mm French pieces that the BEF borrowed to make up for shortages. I'll also be able to use this with the French when they arrive (and they are on order!).
 Some more support - A sniper and Rifle Grenade.
And some German recce to give those BEF lads a hard time. Not a bad little model from a Polish company. It was supposed to have the funker aerials on top which proved to be a real pain because the struts to hold it up were so delicate they just snapped when I tried to cut them off the sprue. Same with the main gun (which is a replacement).
And some SdKfz 251 halftracks. These are the Italeri quick-make kit with two in the box. Sandy coloured. painted for Tunisia and beyond, they can also stand in for basic desert vehicles. I'm not a purist. I paint my models to get the widest use out of them. As long as they're not green in the desert or Caunter Scheme in 1940 France, I'm okay with it.
And lastly... This stuff. This is cobbled road on thick card. It looks okay but it's too neat for my liking. It's for railway layouts. I'm not sure what to do with it. I bought it a while back for some reason. I suppose I can stick in on to thicker card or maybe even give it a backing of gaffer tape. That is a possibility because gaffer tape might lend it a degree of flexibility over time.
There's a lot more of it than appears in the pic. Maybe I should get to taping.


Thursday, October 24, 2019

More DAK & Mediterranean Terrain

I've painted up the last remaining figures of DAK to add to my collection. These are a mox of Simons Soldiers and a few AB (tell a lie, they're not the last, I still have a DAK pioneer section to paint up).

I've also been making some terrain. The palms came from China via ebay. $8 for 24 trees. Here are the first few terrain pieces. They can be for anywhere in the Med. If I want to add them to a more fertile area I can just add some flock or lichen to create some bushes.

I gave the fronds a quick brush of French Tank Uniform followed by a splash of yellow-green. The trunks are a dusty grey followed but a dry-brush of stone.

The rocks are actually pieces of a yoga brick torn up into pieces. The original colour was dark grey so they got a heavy dry-brush followed by a lighter dry-brush. They look good and they virtually weightless. In the pic of the box below, the actual box weighs more than the rocks.

P.S. - I don't know the real purpose of a yoga brick.

Thursday, October 10, 2019

Brew Up

A warning to all plastic kits that refuse to bend to my will. 
I will destroy you and your punishment will be remembered.
Your suffering will be the stuff of legend!


This is an Airfix Churchill. It was an absolute pain in the arse to make and when it came time to put the tracks on it became even more of a pain. So, I bough some PSC Churchill's and made them. Then I bought more. This poor soul has now become a terrain piece. A terrain piece that I'm quite happy with.


Wednesday, October 2, 2019

Desert Scatter Terrain and Some More Tanks

I've been busy getting things done over the past few days and here's some of it:

Some cactus patches for Tunisia or Sicily or Crete or virtually anywhere in the Mediterranean. These are from Pegasus Hobbies. Not too bad for a single box. I now need to get some palms to add a bit of height and some more greenery for Tunisia.

The largest of these pieces stands about 5cm, so they could make up a formidable obstacle if grouped together.


And some tanks:

I picked these Grants at my club's sales day. They're old Hasegawa Models. One had a $1.95 price tag on the box. The turret's on these, however, are printed because the originals are too small. I did replace the printed 37mm guns with the original guns in the kit because the printed ones were the same size as the 75mm gun. The figures are AB.

I put these models onto bases because the tracks weren't in great shape and they decided to give me some grief. I don't like putting bases on tanks but there was no other choice. Also, there's two pics of the front view - This is because I took a pic before I realised that I hadn't finished the tac signs.

I've run out of 7th Armoured decals so I put on some spare number tac signs (top pic) then I painted out the numbers and painted in the Desert Rat sign (bottom pic). They came out okay.

And a pair of Marder III's. Although it can't be seen, these have the divisional markings for the Hermann Goering Division. I've decided to concentrate on the HG and 1st Fallschirmjager for my Mediterranean Germans. My DAK can also stand in for the HG in 1943, if needs be.

I don't have a very much armour for the HG. A troop of Pz IV's, a couple of Tigers and these. But I do have Pz III's in DAK colours which could also be used in Sicily or early Italy. 
So that's it for now.


Sunday, September 1, 2019

8th Army & Places for Them to Hide

I've got a few things finished recently. I'm actually going pretty fast with a lot of it.

The first thing I finished was an armoured car - A Morris CS9, as far as I can tell (it's a pretty rough resin kit) with a figure from AB. I also made some Plastic Soldier Company 6pdrs made up. Nice kits with crew and Lloyd Carriers. I don't know why, but I didn't have instructions but they were easy enough to put together. I painted them up for Tunisia/Mediterranean.

And at the NWA Open Day, yesterday I picked up these nice little hasty defences. Pre-painted resin from I know not where. I just gave them a bit of a dry brush to bring out a bit of detail and they're ready to go.